Перейти к содержанию
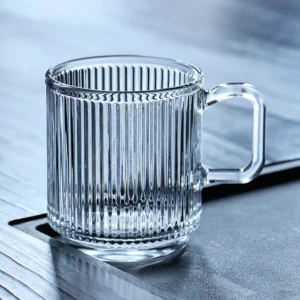
Раскрашивание стеклянных стаканов кажется простым делом, но у многих в итоге краска отслаивается, цвета получаются неровными, а рисунки блекнут уже после первой мойки. Даже небольшие ошибки могут свести на нет часы работы.
Лучший способ раскрасить стеклянные стаканы — использовать краску, предназначенную специально для стекла, тщательно подготовить поверхность, наносить краску тонким слоем и правильно высушить краску. Если каждый этап выполнен правильно, раскрашенные стеклянные стаканы сохранят яркость цвета и прочность на долгие годы.
Многие люди уделяют внимание только самой росписи. По моему опыту, подготовка поверхности, выбор краски и процесс отвердевания имеют гораздо большее значение. В этом руководстве каждый этап объясняется простым языком, чтобы вы могли создать красивые стеклянные стаканы, которые прослужат долго.
Какую краску лучше использовать для раскрашивания стеклянных стаканов?
Если покрасить стеклянный стакан неподходящей краской, это может привести к напрасной трате времени и денег. Некоторые краски отслаиваются уже после первой мойки, а другие так и не прилипают к гладкому стеклу.
Лучше всего для раскрашивания стеклянных стаканов подходят специальные краски для стекла или эмалевые краски. Эти краски хорошо сцепляются со стеклом, устойчивы к выцветанию и после надлежащего отвердевания или обжига становятся гораздо прочнее.
Стекло имеет очень гладкую поверхность. В отличие от дерева или бумаги, оно не впитывает краску. Именно поэтому выбор подходящей краски — это первый шаг к долговечному покрытию.
Почему обычной акриловой краски недостаточно
У многих начинающих художников дома уже есть акриловые краски. Ими легко пользоваться, и они выпускаются в широкой цветовой гамме. Однако обычные акриловые краски не предназначены для рисования по стеклу.
Без специального стеклянного покрытия или герметизации обычная акриловая краска легко подвергается появлению царапин. Кроме того, после многократных мытье она может отслаиваться.
Некоторые художники по-прежнему используют акриловую краску, поскольку она недорогая. Просто после этого они наносят защитный лак. Такой подход может подойти для декоративных изделий, но, как правило, это не лучший выбор для стаканов.
Лучшие варианты краски
В приведенной ниже таблице сравниваются наиболее распространенные варианты.
| Тип краски | Долговечность | Простота в использовании | Требуется выпечка | Идеально подходит для |
|---|---|---|---|---|
| Краска для стекла | Превосходно | Легко | Обычно — да | Стаканы |
| Эмалевая краска | Превосходно | Средний | Обычно — да | Длительное использование |
| Акрил для различных поверхностей | Хорошо | Очень просто | Иногда | Проекты «Своими руками» |
| Обычный акрил | Ярмарка | Очень просто | Нет | Только декоративные предметы |
Стоит ли использовать аэрозольную краску?
Аэрозольная краска обеспечивает ровное покрытие. Она хорошо подходит как для однотонных цветов, так и для создания матовых эффектов.
Однако при выполнении детальных рисунков аэрозольной краской сложнее контролировать процесс нанесения. Кроме того, для этого требуется хорошая вентиляция и тщательная маскировка.
Для рисования вручную цветов, надписей, логотипов или узоров обычно лучше подходят кисти или краски-маркеры.
Маркеры для рисования по стеклу
Красковые маркеры становятся очень популярными. Они сочетают в себе удобство использования ручки и стойкость краски для стекла.
Они хорошо подходят для:
- Индивидуальные подарки
- Свадебные бокалы
- Праздничные украшения
- Логотипы компаний
- Простые линейные рисунки
Маркеры также уменьшают стекание краски, что помогает новичкам создавать более аккуратные рисунки.
Подготовка стекла перед покраской
Даже самая лучшая краска не сможет прилипнуть к грязной поверхности.
Перед покраской всегда:
- Вымойте стекло тёплой водой с мылом.
- Полностью высушите его.
- Протрите поверхность медицинским спиртом.
- После этого старайтесь не прикасаться к окрашенному участку пальцами.
Кожные жиры могут ухудшить адгезию краски.
Кисти тоже имеют значение
Разные кисти дают разные эффекты.
- Круглые кисти позволяют рисовать тонкие линии.
- Плоские кисти позволяют обрабатывать большие площади.
- Кисти для контурной прорисовки позволяют создавать детализированные надписи.
- Кисти-губки позволяют создавать ровный фон.
Качественные кисти также оставляют меньше разводов.
Во многих проектах этап подготовки занимает почти столько же времени, сколько и сама покраска. Именно от этих дополнительных усилий часто зависит, прослужит ли покрытие несколько месяцев или несколько лет.
Как обжигать расписные стеклянные стаканы?
Многие расписные стеклянные стаканы в первый день выглядят идеально, но после нескольких мытий на них начинает отслаиваться краска. Причиной этого зачастую является пропуск этапа закрепления краски.
Для запекания расписанных стеклянных стаканов поместите их в холодную духовку, медленно нагревайте до температуры, рекомендованной производителем краски, запекайте в течение необходимого времени, а затем дайте им остыть внутри духовки, прежде чем вынимать их.
Обжиг помогает многим краскам для стекла прочно скрепиться с поверхностью. Под воздействием тепла краска активируется, что обеспечивает гораздо более прочное покрытие.
Почему нужно начинать с холодной духовки?
Многие люди допускают ошибку, ставя окрашенное стекло в раскаленную духовку.
При нагревании стекло расширяется. Резкие перепады температуры могут вызвать напряжение внутри стекла и привести к появлению трещин.
Если начать с холодной духовки, это позволит и духовке, и стеклу нагреваться постепенно одновременно.
Типичный процесс выпечки
Хотя у каждого бренда краски есть свои инструкции, общий процесс остается схожим.
| Шаг | Действие |
|---|---|
| 1 | Дайте нарисованному рисунку высохнуть не менее 24 часов |
| 2 | Поставьте стакан в холодную духовку |
| 3 | Нагрейте до температуры примерно 160 °C (320 °F) |
| 4 | Выпекать примерно 30 минут |
| 5 | Выключите духовку |
| 6 | Оставьте стакан внутри до полного остывания |
Всегда внимательно читайте инструкции на этикетке краски, так как температурные режимы могут отличаться.
Все ли стеклянные стаканы можно обжигать?
Нет.
Тонкое стекло, хрусталь, старинное стекло или стекло ручной работы могут плохо переносить высокие температуры в духовке.
Перед запеканием проверьте, указано ли производителем, что стекло можно использовать в духовке.
Недорогие декоративные стаканы могут иметь небольшие внутренние напряжения, возникшие в процессе производства. Под воздействием высокой температуры риск поломки может возрасти.
Сушка на воздухе и выпечка
Некоторые краски допускают отвердевание на воздухе вместо запекания.
Отверждение на воздухе обычно занимает гораздо больше времени. В зависимости от продукта для полного отверждения может потребоваться несколько недель.
Запекание ускоряет процесс и зачастую придает поверхности более твердую текстуру.
Распространенные ошибки при выпечке
Несколько ошибок снижают срок службы.
Одной из распространенных ошибок является слишком раннее нанесение следующего слоя. Если краска еще не высохла достаточно, на влажной поверхности могут образоваться пузыри.
Еще одной ошибкой является использование температур, превышающих рекомендуемые. Дополнительное нагревание не приводит к более прочному покрытию. Напротив, это может вызвать обесцвечивание краски или повредить стекло.
Еще одной проблемой является извлечение стекла, пока оно еще горячее. Быстрое охлаждение может привести к термическому шоку.
Дополнительные советы по отверждению
После запекания многие производители красок рекомендуют подождать ещё два-три дня, прежде чем мыть стекло.
Это дополнительное время отверждения позволяет покрытию достичь максимальной прочности.
Терпение зачастую приносит гораздо лучшие результаты в долгосрочной перспективе.
Можно ли мыть расписные стеклянные стаканы в посудомоечной машине?
Многие люди, получив в руки красивый стакан с росписью, сразу же задаются вопросом: выдержит ли он мытье в посудомоечной машине. Ответ зависит от краски, процесса закрепления росписи и способа мытья.
На некоторых расписных стеклянных стаканах указано, что после надлежащей фиксации рисунка их можно мыть в посудомоечной машине, однако мытье вручную, как правило, является наиболее безопасным вариантом, поскольку это значительно продлевает срок службы рисунка.
Посудомоечные машины сочетают в себе горячую воду, моющее средство, сильный напор воды и повторяющиеся движения. Эти условия гораздо более агрессивны, чем бережная ручная мойка.
Почему посудомоечные машины повреждают лакокрасочное покрытие
На состояние окрашенных поверхностей негативно влияют несколько факторов.
Высокие температуры приводят к размягчению некоторых красок.
Сильные моющие средства постепенно разрушают защитные покрытия.
Водяные струи неоднократно попадают на окрашенный участок.
Когда чашки соприкасаются друг с другом, также может возникнуть царапина.
Даже краски, которые рекламируются как пригодные для мытья в посудомоечной машине, могут постепенно терять блеск после сотен циклов мытья.
Что на самом деле означает «подходит для мытья в посудомоечной машине»?
Многие люди неправильно понимают эту фразу.
Надпись «Можно мыть в посудомоечной машине» не означает, что рисунок никогда не поблекнет.
Напротив, это означает, что краска прошла испытания в определённых условиях мытья и способна выдерживать обычную эксплуатацию в посудомоечной машине в течение определённого времени.
Реальные условия эксплуатации могут различаться в зависимости от модели посудомоечной машины.
Мытье рук по-прежнему остается лучшим вариантом
По возможности мойте окрашенное стекло вручную.
Применение:
- Мягкое средство для мытья посуды
- Теплая вода
- Мягкая губка
- Легкое давление
Не используйте стальную вату или абразивные губки.
Участки, которые не следует окрашивать
В целях безопасности при употреблении избегайте нанесения краски на поверхности, которые непосредственно соприкасаются с пищевыми продуктами или губами.
Как правило, сюда входят:
- Обод
- Внутренняя поверхность
- Верхний край, где люди пьют
Расположение украшений в нижней части снаружи также снижает износ при стирке.
Коммерческие продукты и самодельные изделия
При заводской отделке стеклянной посуды обычно используется промышленное оборудование для отверждения. Такие покрытия гораздо прочнее, чем в большинстве домашних проектов.
Самодельные расписные чашки могут быть достаточно прочными, но, как правило, с ними нужно обращаться более осторожно.
Как повысить устойчивость посуды к воздействию посудомоечной машины
Существует несколько привычек, которые помогают продлить срок службы расписных чашек.
Перед мытьем дайте краске полностью высохнуть.
Не допускайте длительного намокания стекла.
Храните стаканы аккуратно, чтобы окрашенные поверхности не соприкасались друг с другом.
Используйте деликатные режимы посудомоечной машины только в том случае, если на изделии явно указано, что его можно мыть в посудомоечной машине.
Соблюдение этих простых мер предосторожности зачастую позволяет вдвое продлить срок службы произведения искусства.
Как долго держится краска на стеклянном стакане?
Никто не хочет тратить часы на нанесение красивого рисунка, чтобы через несколько недель увидеть, как он исчезает. Долговечность зависит от нескольких важных факторов.
Правильно нанесенная и отвердевшая краска для стекла может прослужить много лет. Срок службы зависит от качества краски, подготовки поверхности, условий отвердевания, способов мытья, а также от частоты использования стекла.
Раскрашенный стеклянный стакан, как и многие другие готовые изделия, — это тот случай, когда использование качественных материалов и тщательное исполнение обычно обеспечивают гораздо более высокие эксплуатационные характеристики в долгосрочной перспективе.
Основные факторы, влияющие на долговечность
От нескольких факторов зависит, как долго краска сохраняет привлекательный вид.
Качество краски
Краски для стекла премиум-класса содержат более качественные связующие вещества и пигменты.
Они лучше сопротивляются выцветанию, чем более дешёвые товары.
Подготовка поверхности
Даже крошечное количество смазки может ослабить сцепление.
Очистка спиртом перед покраской — один из самых простых способов повысить долговечность.
Количество слоев
Несколько тонких слоев обычно дают лучший результат, чем один толстый слой.
Каждый слой высыхает более равномерно и лучше сцепляется с предыдущим слоем.
Качество отверждения
Независимо от того, высушивается ли продукт на воздухе или запекается, тщательное соблюдение инструкций производителя играет решающую роль.
Ожидаемый срок службы
Вот краткое руководство.
| Условия использования | Расчетный срок службы |
|---|---|
| Только для демонстрации | Много лет |
| Периодическое мытье рук | 5–10 лет или более |
| Частое мытье рук | Несколько лет |
| Частое использование посудомоечной машины | 1–5 лет в зависимости от краски |
Эти показатели варьируются, поскольку краски разных марок демонстрируют разные характеристики.
Признаки того, что может потребоваться повторная покраска
Со временем вы можете заметить:
- Небольшие царапины
- Выцветание цвета
- Потрескавшиеся края
- Потеря блеска
Эти изменения, как правило, происходят постепенно, а не сразу.
Можно ли отремонтировать поврежденное лакокрасочное покрытие?
Небольшие поврежденные участки зачастую можно подкрасить.
Тщательно очистите эту зону.
Нанесите краску соответствующего цвета.
Дайте изделию как следует высохнуть.
Если рекомендуется, пропеките или выдержите ещё раз.
Обширные поврежденные участки сложнее восстановить так, чтобы не осталось следов, особенно если речь идет о детальных рисунках.
Хранение тоже имеет значение
Многие забывают, что условия хранения также влияют на срок службы.
Если сложить раскрашенные стаканчики вплотную друг к другу, возникает трение.
Использование мягких разделителей или хранение стаканов по отдельности помогает защитить окрашенные поверхности.
Если не подвергать чашки воздействию прямых солнечных лучей, это также позволит замедлить выцветание цвета на протяжении многих лет.
Качественно изготовленный стакан из расписного стекла — это не просто украшение. Он становится предметом, который можно наслаждаться снова и снова. Тщательная подготовка, качественные материалы и правильный уход — все это в совокупности позволяет сохранить как красоту, так и функциональность готового изделия.
Заключение
Раскрашивать стеклянные стаканы несложно, если правильно выполнять каждый шаг. Выбирайте качественную краску для стекла, тщательно подготовьте поверхность, дайте краске высохнуть в соответствии с инструкцией и аккуратно вымойте готовый стакан. Эти простые правила помогут вам создать красивые раскрашенные стеклянные стаканы, которые на долгие годы сохранят яркость цветов, прочность и будут радовать вас.